I am a visual learner from way back. Patterns are too hard for me to conceptualise. I learn best by watching others in a workshop or tutorial context and then having a go at it myself. Youtube has been the source of many of my quilting and sewing lessons.
Cash and Carry Pouch
In January, I picked up an easy-sew 'Cash and Carry' zipper pouch pattern at a sweet Coffs Harbour quilt shop called Hunters and Collectors. The pattern is by Atkinson Designs and was only $15 but you can get it at the link above for only $8. The lady in the store assured me that it was easy to follow.
It just so happened that my mum had the same pattern, and as we were staying with my folks on Saturday night, she was able to show me how to put it together. So together we cut it out and put a prototype together. The zip was tricky but only because it got stuck under the foot and you need a third hand to lift the foot higher.
So before I forgot, I set about putting together one on my own today.
1. I used scrap batting rather than fusible batting so I needed to pin my backing fabric to the batting. 2. Centre the main strip on the opposite side facing up.
3. Choose contrasting fabric strips for either side. 4. Pin right sides together and sew through all l payers 1/4 "
5. Pin and quilt-as-you-go the other contrast strip. Press and fold back.
6. Sew these 2 strips down with a scant 1/4".
7. Trim the batting either side of the contrast strips. 8. Trim the panel into desired length. In my case the zip was 71/2" and I made my lengths 71/2 also.
9. Trim the casing.
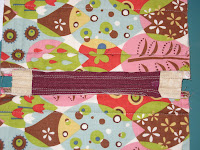
10. Centre the zip, leaving 1/2" either side of the pouch top. Pin with the zip halfway done up.
11. Sew the zip down with a walking or zipper foot. Stop before the zip, needle down.
12. Using a paper clip attached to the zip, pull the zip through to the other side of the walking foot and continue sewing the zip fabric down.
13. Repeat for the other panel. 14. Sew the zip fabric down in place.
15. Sew a quarter inch around all three sides.
16. Snip off the corners.
17. Turn right-way out and push out the corners (chopsticks are great for this!)
18. Sneaky peak inside. Add a ribbon to the zip for ease of opening.
19. Two easy-sew pouches complete in 2 days.
So what was I so afraid of?
You can find a similar great 'Patchwork Pencil Pouch' tutorial at LBG Studio.
I am linking with...

It's Easter this weekend and that means extended holiday time for my husband from Thurs-Tues. The kids have holidays for 2 weeks, but our annual camping trip has been rescheduled for September, so we are not going away anywhere. Rather daddy is pitching the tents in the yard and the kids are sleeping out with him over the Easter break. (It always rains at Easter in Australia!)
This is what's on the menu so far...
I am linking up with...


Great job on the zippers Fiona! Love the paperclip tip. I always have trouble sliding the zip open - have to remember that one.
ReplyDeleteI am so impressed by how tidy your zip end coverings are. Mine always end up a bit squished!
Ah, the prototype one had similar problems so I made the 2nd with 1/2" zip cover endings. Also make sure your zip is centred and 1/2" in from the pouch dimensions on either side.
DeleteGreat step by step instructions. I've yet to try anything with a zipper, but hope to make some of the cute pouches you all are making, some day.
ReplyDeleteI don;t know why it took me so long Simone...such a practical item...you can never have too many pouches!
Delete