Tiny snippets of my life in paper crafting, quilting, sewing, organising, DIY, faith, sensory processing disorder, autism, aspergers, chicken raising and gardening.
Showing posts with label Quilt Club Australia. Show all posts
Friday, 31 May 2013
Polaroid 9 Patch
What a lovely quilt to finish up the month of May. It is my only finish this month but it was an important one.
The 9 Patch blocks were sewn by 14 ladies from the Quilt Club Australia Bee. Twelve were from my Bee #1 and two were from ladies in another QCA Bee. You can find my tutorial for the block here.
This quilt will be packaged up and sent off to a family who lost their house (and very nearly their own lives) in the Tasmanian Bushfires in January this year.
That brilliant orange Polaroid camera block was made by Kristy of Quiet Play who created the fab paper pieced pattern for it. You can find that Camera pattern in her Craftsy shop along with the patterns for the random polaroid blocks on the back.
Kristy has already sent 4 quilts to the Bushfire affected family and I will send this one, along with my first ever quilt.
I had just enough time this afternoon to catch the last of the sun to photograph the quilt. And so did the chooks.
Tuesday, 15 May 2012
Rain Cloud Mug Rug
Zakka Style Sew-Along - Week 7
I was actually going to skip this Zakka Style project because I have 2 mug rugs already and the design did not really interest me. However after spending hours cutting up fabrics, I needed to do some sewing.
This project was made with all scrap fabrics, mostly leftover from what Denyse Schmidt and Kona fabrics I had been cutting earlier that day.
It is a simple pattern and design and really you can pour as much creativity into this project as your imagination and time allows. Perhaps the original's simplicity of design and material best highlights the Zakka style.
Some Tips
Hold your book up to a window to trace the applique design to your 'cloud' fabric.
You don't need to do hand stitched 'needle turn' applique to attach the rain cloud. A close stitch width and length zig zag will do the job just as nicely.
It may be a good idea to use fusible interfacing to keep it in place.
I used a blanket stitch for mine.
If you are going to machine quilt the 'wind' lines, I suggest you clearly mark them on your work with a water soluble marker. I drew mine by hand.
If you have a darning foot, attach this and drop the feed-dogs.
Then warm up your free-motion skills by doing a few practice swirls. I made the mistake of doing this cold and so it looks very tentative.
This 5" charm was a scrap sent with an Etsy order so I used some leftover scraps of Kona Ash from cutting the Katie Jump Kites solid that morning. This bumped it out to about 6" square.
I have added quite a few colours to my stash since hand quilting the Fussy Fairytales quilt and thought that I might put them to some use. I tossed up using only reds and pinks but decided upon the 7 colours of the rainbow instead.
My front was slightly larger than the back but I spray basted them together and cut the front down to match.
Binding the Mug Rugs
Now here's where the pattern becomes too vague for non-quilters. It tells you to bind the quilt with a 1/4" seam allowance and using the single fold binding directions on page 25. However, these directions are for a straight piece and DO NOT explain what to do at each corner. Here's where quilters would do what's known as a Mitred corner. There is a tutorial here to help those who do not.
Sew the binding down on 3 sides and leave the ends unsewn with a 3" gap.
Fold one of the strips back on itself and lay the opposing strip over the top and stitch over the top with a back stitch.
Trim the excess 'tails' of binding off and then fold the binding over to the back and pin.
Turn the binding up under itself at the back and pin down with pins. I use bobby pins.
Flip the mug rug back to the front and then stitch in the ditch between the fabric and the binding being sure to catch the binding at the back. A normal foot is fine for single-fold binding rather than the usual 'walking foot' used in double-fold binding. You may want to read up on binding techniques at Red Pepper Quilts, Crazy Mom Quilts or Cass the Coolest.
Set the kettle boiling and pour yourself a cup of tea, throw in a treat and enjoy your mug rug.
How are you going on the Zakka Style Sew-Along? Such lovely ladies on the Flickr page and I have one Quilt Club Australia friend join this week. Nice!
Linking up with...

Friday, 2 March 2012
Flood Gates and Garden Gates
Well it's now officially Autumn in Australia but you would not know it. There's a huge low pressure trough causing lots of rain right from the top end, the central deserts and down to south eastern Australia...and it is moving s-l-o-w-l-y. We have had more floods this week in the southern part of my state, New South Wales.
![]() |
Satellite image taken 2nd March 2012 courtesy of the BOM |
Towns like Goulburn, Cooma and Bathurst are evacuating residents in low lying areas. Even my beloved town of Tumut has copped many hundreds of millimeters of rain and the new 'Little River' bridge (replacing the old one that was washed away in a previous 2009 flood) is now underwater. You would think that they would build it higher!
And speaking of building, the new Cotter Dam in western ACT is still under construction and is now overflowing!
The old Cotter dam is completely submerged for the first time in its 100 year history!
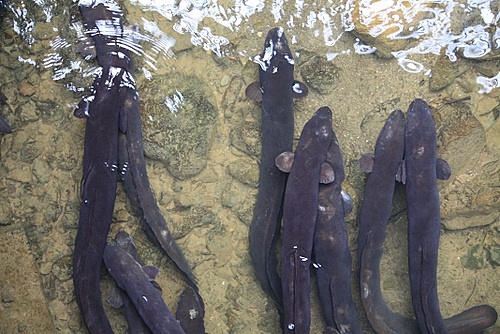
And in Western Sydney the Warragamba Dam is expected to breach the spillway tonight. In 2007/8 my husband was an engineer on the Windsor flood evacuation bridge and thankfully that will help residents downstream once the spillway opens automatically.
At least the eels will be happy about that. During the drought they were all trapped there for years. Now they can make their migration back to the warm waters of New Caledonia to spawn again. The great migration of east coast eels is an amazing story...see it here.
I only heard about this about 10 years ago when a boy in my class did a talk on it. His dad is the chief engineer at Warragamba and he brought in a map and photos of how these elvers come from the Coral Sea, swim up the Hawkesbury River, climb the cliffs next to the dam wall, enter a culvert, wait in the drain until they can wriggle out, slither across a round-about and into the dam. I was incredulous and I really didn't believe him. But it's all true! And he later brought in an article from 'Australian Geographic' to prove it. I had so much respect for him and the eels after that! (it was a brilliant talk Nathan!)
March Bee Block - Grey and Gold Garden Gate
I was seriously lacking these colours from my stash though and put out a call to the girls in the Bee. Kay from Shocking Hocking and Jane from Coffs Fresh Quilters, came through with some great prints.
Ironing block number four.
Sew the tops onto the middle square.
Then the sides on.
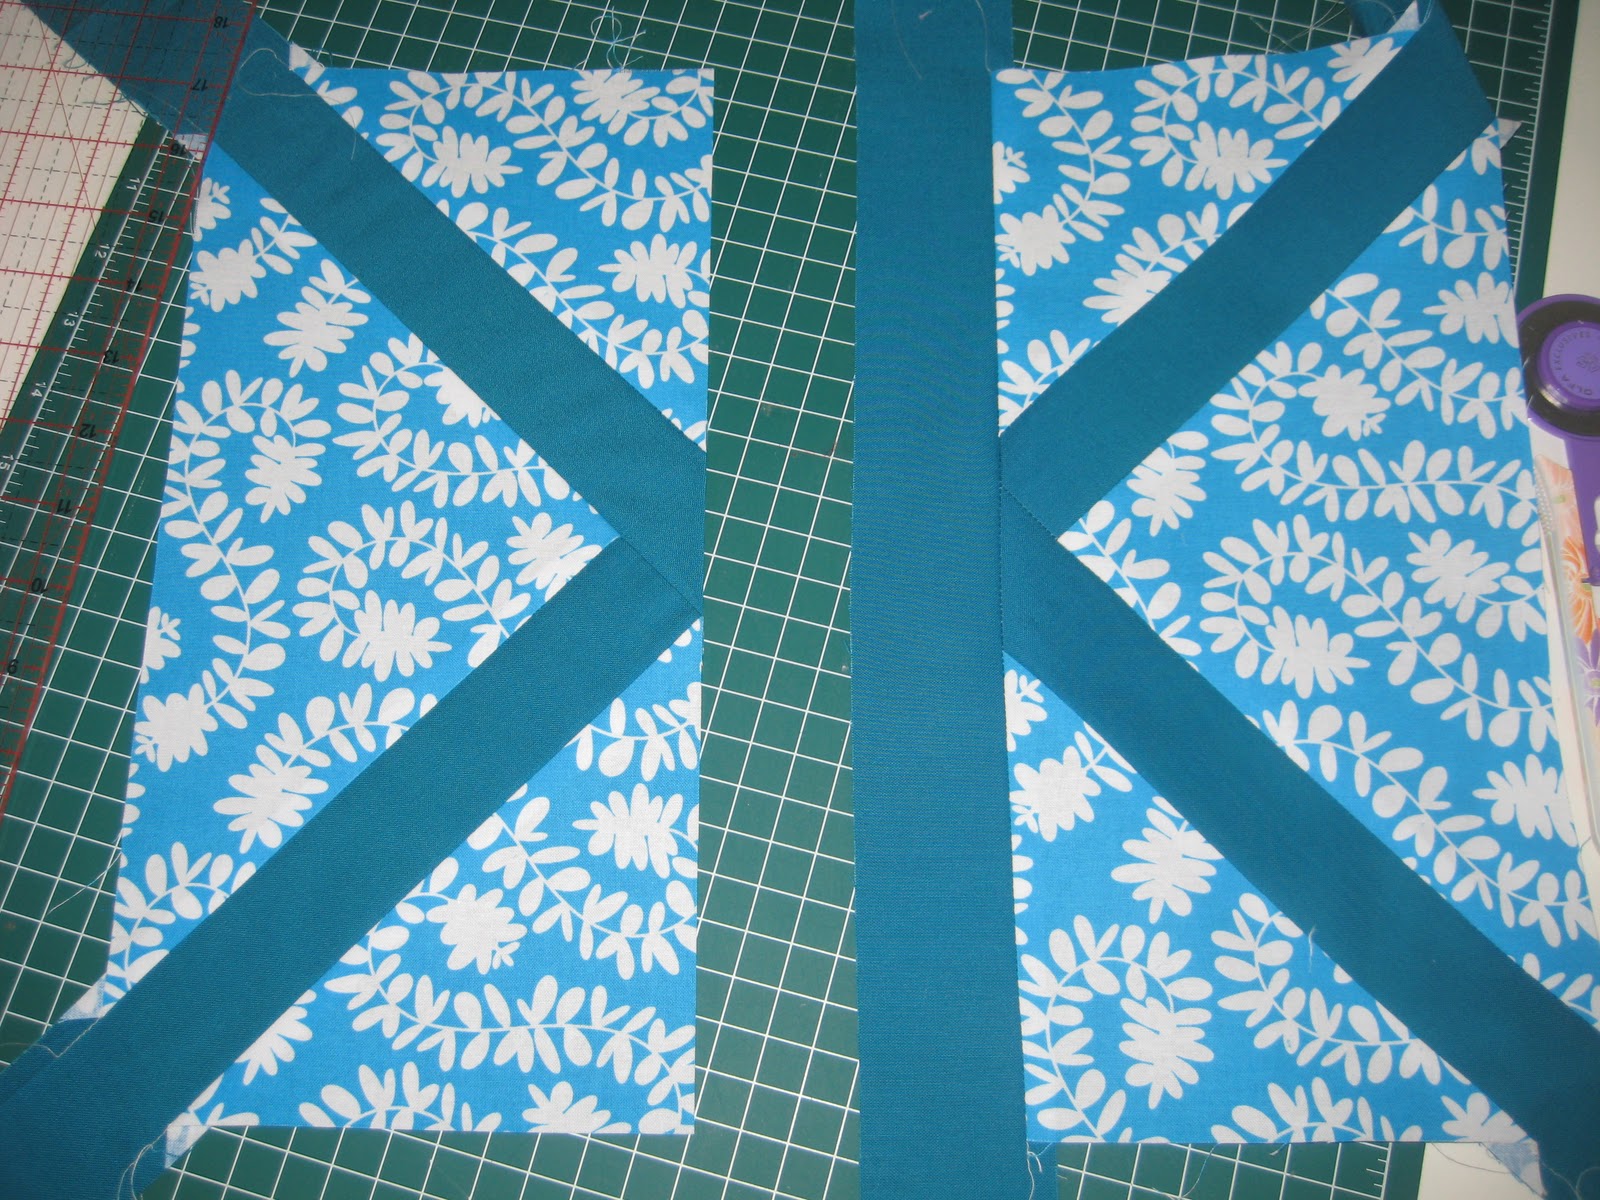
We are using generic white homespun for the duration of the Bee. But to be honest all white fabric looks the same to me and I didn't label mine and separate it. So I took out my white fabric and cut and sewed...all looking great as you can see below.
And then I ironed them and the white fabric kind of distorted by shrinking inwards in the middle and outwards on the ends. I don't know if you can see the subtle differences in the two photos but it's there. My nice parallel seams now looked all wonky.
Talk about frustrating! However the blocks still came together...they just don't look so great on the back. I have no idea what white fabric blend I picked up but I will definitely label this one 'do not use again!'. Sorry Maz.
Anyway I got 6 blocks out of the scraps and stash. I put the leftovers into a bag ready to post along with the blocks on Monday.
Anyway the report just in, is that the Warragamba Dam reached 100% capacity at 7pm tonight and the spillway is now OPEN! Go the Eels! It must be like a giant waterslide for them.
Tuesday, 17 January 2012
Block of the Month (BoM) with Craftsy
One of my goals in 2012 is to challenge myself with quilting blocks. I have never signed up to a 'Block of the Month' challenge BUT this one from Craftsy BoM comes with video lessons. Being a visual learner I was happy to sign up.
My online 'Quilt Club Australia' group has set up a QCA 2012 Craftsy BOM support page where we can create and share. It is open to other Aussies too. Feel free to join up at any time.
January Blocks
Asterisk
It was easy to follow the instructions (once I could get a computer to liaise with our new modem - that's still an ongoing problem btw) with the online tutorial.
Wonky Pound Sign
Now even less cutting and sewing for this block.
The hardest decision was whether or not to use white or jade for the solid fabric. Most of the samples I have seen use white but I decided that the jade would tie my various fabric together more successfully. It was a relief to see a great result.
Until next month (you can't actually get ahead with the online tutorials).
Subscribe to:
Posts (Atom)