Showing posts with label 1/4 inch. Show all posts

Thursday, 1 March 2012

An extra day!

I had a finish this week. My very long table runner, slated for the top of my bedroom dresser, was quilted and bound. I had planned to just shadow the ditch but it meant only 4 lines of quilting  and was very lacklustre. So I went to 2 blogs for inspiration: this block by Jess of 'The Elven Garden'

 and this block by Kristy of 'Quiet Play'.

From what I can gather both ladies did 1/4 inch distances between the triangular lines, however, I wanted to keep the fabric and design soft, so I opted for nearly 1/2" distances.
I knew that I needed something geometric to give the central strip some character and texture. So, taking my trusty 6.5" ruler I set to work making the diagonals with a washable marker.
I used a walking foot.
I was afraid that it might be too stark, so I put out a call to my online Quilt Club Australia' friends for opinions. No one though it was too minimal. 
I like the use of negative space in design. I did seriously consider a small triangle opposite the point of the negative space, but thought it might like too trite.
Then I used up some scrappy binding and added some more....
and was "this close" when I ran out. Dang! Inset new piece of binding and join the ends together.
Then instead of pinning, I decided to try a bobby pin method I'd seen on Pinterest. It seemed to work quite well and much faster but next time I will put them in upsidedown.
The scrappy binding looks much better then the tone on tone brown I auditioned.
The new look dresser table top.
Beside table - his
Beside table - hers

This week's stats:
Completed projects - 1 = Scrappy "Hope"  table runner 
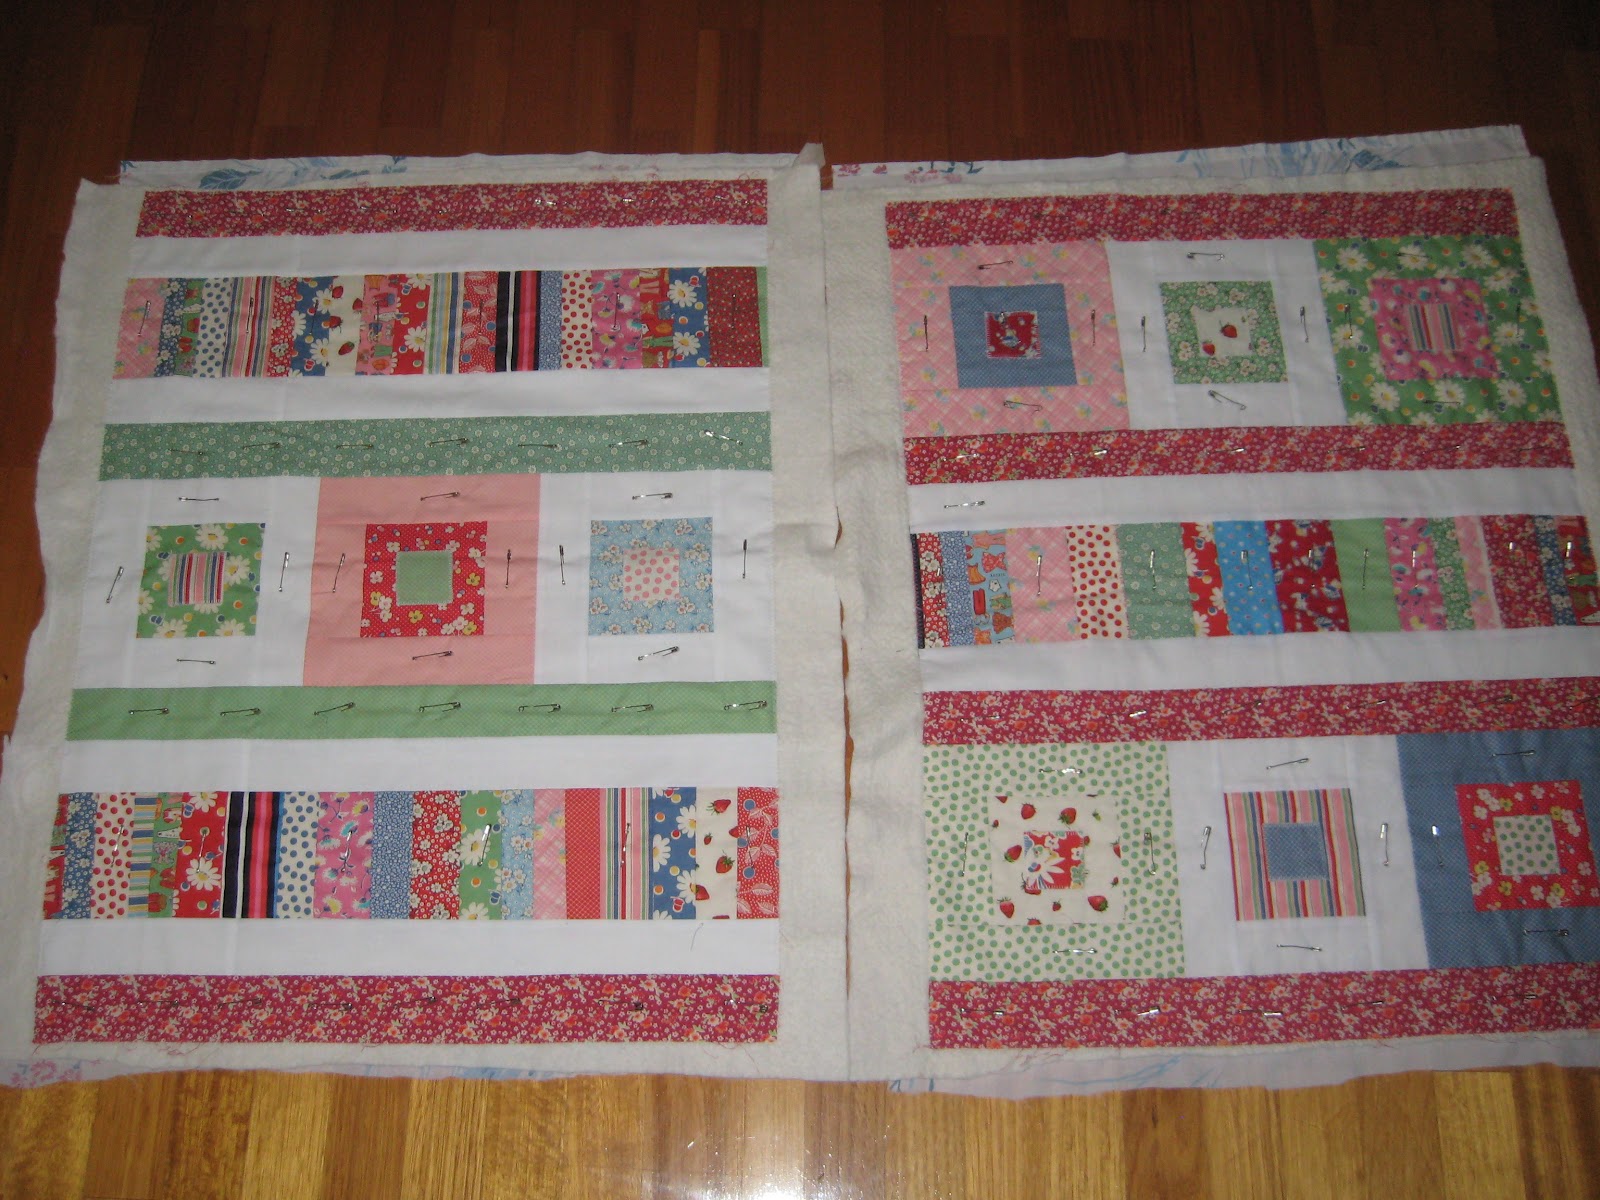
New projects - 1 = baste and quilt 'HR Far Far Away 2&3 Fussy Fairytales' quilt
On Hold - 1 = Feb  scrappy log cabin quilt - once all the blocks come in
Currently in progress - 1 notebook cover,
                                             - 3 dolly quilts - 2 of them are now backed, basted and ready to quilt.


I am linking up with WiP Wednesday over at Freshly Pieced....lots of other goodies out there today.

'Heather Ross Far Far Away 2&3 Fussy Fairytales' quilt top ready to baste.

My mum pieced this one and she altered Kate Conklin's pattern by making the coloured frames floating and adding more blocks. It is just gorgeous and the linen blend fabrics are so nice to work with.


Sunday, 12 February 2012

Scathing Scant Seams

Considering it is only the second weekend of February, I am not sure why I was feeling a bit far behind with the Craftsy BoM tutorials for the month. With some time up my sleeve this weekend I wanted to get them both done before I start my next quilt project.

Captains L to R - Keith (snaps easily), Phil (kind-hearted but sadly passed away in 2010), Andy Hillstrand (cutest), Jonathan Hillstrand (biker) and Sig (no sentimentality or sleep with him) 
So I set up the computer, cutting board, fabric stash, fan, iron  and the portable dvd player ready to go. I like to listen to, or even watch dvds when I work. My favourite show is 'Deadliest Catch' about Alaskan crab fishing out of Dutch Harbour in the Aleutian Islands. I am not sure there is a simple reason why I love it so much. 


It may be because it is so far removed from my day to day experience. There's the dynamic nature of the Bering Sea, personality clashes, poor diet, days without sleep, dangerous tasks, gamble of crab pot placement, engine and equipment malfunction, mutinous crews, cantankerous captains, quotas, deadlines, rouge waves, storms, ice over, ice pack, accidents, rescues, greenhorns, crab count,  crew pranks, sibling rivalry and the tension between an income versus large amounts of time away from family,

I had a few episodes lined up for my 'Deadliest Catch-up-athon' whilst the rest of the family headed off the swimming lessons. But watching it today cost me time and fabric - learning to piece a new block with half square triangles (HSTs)


Block #3 - The Balkan Puzzle

The trouble began way back at Step 0 - with poor fabric selection. I had the green and white FQ all lined from a recent purchase in a quilt boutique. But when I opened it up to iron, I found that it had sun fading on every fold line (Dang! I should have checked it and they should never have sold it) making it almost useless for large pieces. So then I chose another fabric...cut that, but then realised that if I cut wisely, I could use the original FQ and hide the faded sections in the seams. (Dang again! Now have a few 5 1/2 inch squares to do nothing with - let's hope future blocks can use them up).

The online tutorial at Craftsy used the MSQC easy HST method of sewing around the outside of 2 paired fabric square and then slicing into quarters. I had been reading the comments section and the recurring gripe was difficulty in getting the finished block to measure 12.5" square. A lot of ladies were coming in at only 12" square. This lead to much discussion about quarter inch presser feet and scant seams versus generous seams.
I tend to eyeball my fabric as it passes over the base plate and keep it on the 1/4 inch line. I do have a 1/4 inch foot but find it tends to flare out from the feed dogs, and bumping fabric up against it results in a generous 1/4 inch. So my eyeball method usually comes right in on the money.
But this time I really kept a few thread left of the eyeball line for fear of going over. However the over-thinking and over-cautiouness worked against me and I ended up with a 12.5 x 13" block instead. (Dang! Dang! What the???) Then there were the ever hungry feed dogs trying to eat the corners of my HSTs as I ran them through (Dang! Dang! Dang! Arrrrrgh!) 
I took far too long on the block and felt so deflated by the end that I could not even bring myself to attempt block #4. Golden Rule - never sew when you are tired (or depressed). Give it up for the day, girl!

Block #4 - Chunky Chevron

1. I had 2 mis-starts with my fabric selection (Dang! Dang!) but then settled on some nice complimentary prints to cut up.
2. Traditional ruling down the diagonal this time. (Ah familiar territory!)
3. Pin in place (feeling much more secure).

4. Sew to the right of the line - on both sides - chain piecing (getting my sewjo back now!).
5. Cut down the diagonal line to get 2 HSTs (easy peasy Japanesy!).

6. Press open to the dark fabric and then trim each HST(I am on fire baby, yeah!).

7. Assemble the HSTs and squares into a chevron. (Uh-oh! Can you see the problem? Yes, I trimmed the HSTs to 4 1/2 inches instead of 3 1/2 inches. Doh!).

8. Recut the HSTs and then sew each of the rows together nesting the seams. Block measures just a fraction over 12.5"(Hooray for me!).
9. Trim and breathe a sigh of relief. So much better than the last block despite the hiccup at step 6.

10. Put block 1,2,3 & 4 together and "click" (Looking good so far! Loving those sunflowers in the chunky chevron).