Tiny snippets of my life in paper crafting, quilting, sewing, organising, DIY, faith, sensory processing disorder, autism, aspergers, chicken raising and gardening.
Showing posts with label binding. Show all posts
Wednesday, 4 December 2013
A Figgy WIP
So this is last month's Wombat Stew block for Marieka of Bespoke Bites. Yes it is late.
I have done as much unpicking as sewing already today.
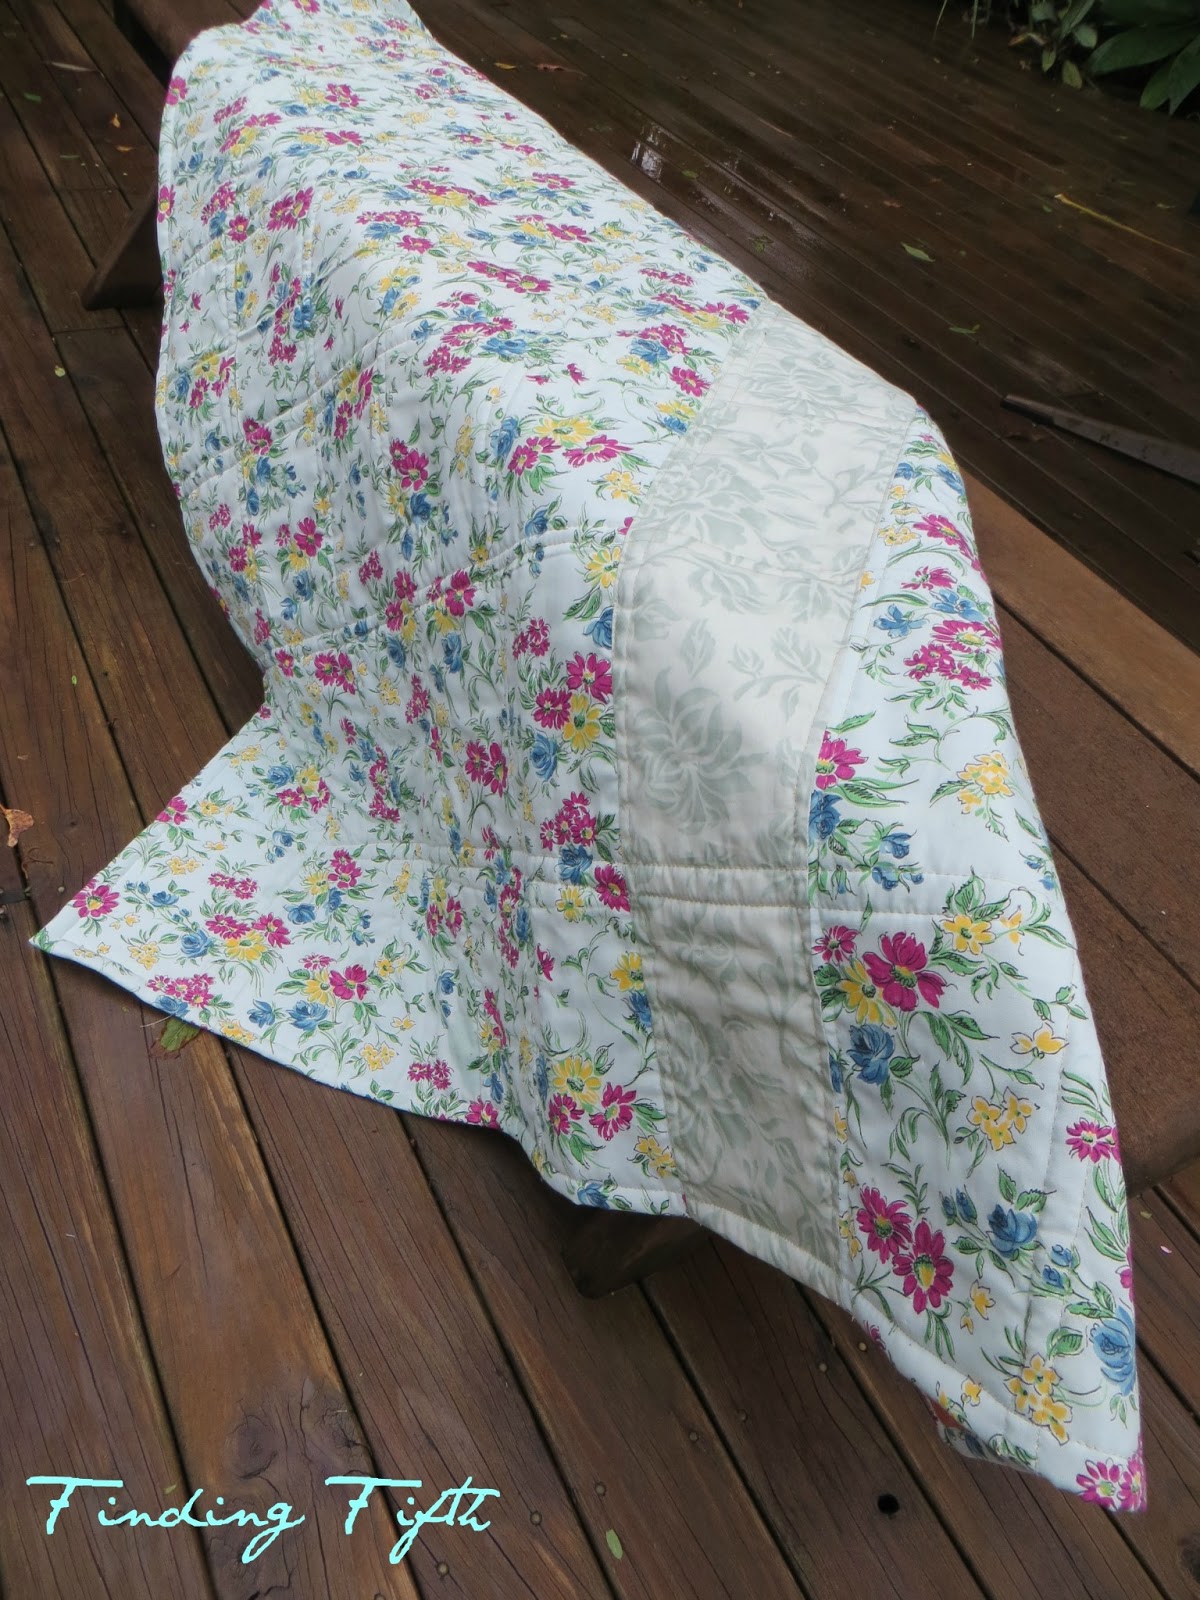
I also have finished the binding on the Parterre Gardens quilt that is to be gifted in a ceremony next Wednesday.
I have to embroider or write my own quilt label as my go-to girl, Liz, just gave birth to a healthy baby boy yesterday.
Don't forget to check out the Cushion for Christmas blog hop . Did you see these Pipsqueaks from Quiet Play yesterday?
Or check out Ms Midge's version with a zipper tutorial?
Today it is over with Molli Sparkles for a purple string block cushion.
I am hosting on Friday so feel free to check back for a Christmas Star tutorial.
Linking up to WiP Wednesday for the first time in months.
Friday, 31 May 2013
Polaroid 9 Patch
What a lovely quilt to finish up the month of May. It is my only finish this month but it was an important one.
The 9 Patch blocks were sewn by 14 ladies from the Quilt Club Australia Bee. Twelve were from my Bee #1 and two were from ladies in another QCA Bee. You can find my tutorial for the block here.
This quilt will be packaged up and sent off to a family who lost their house (and very nearly their own lives) in the Tasmanian Bushfires in January this year.
That brilliant orange Polaroid camera block was made by Kristy of Quiet Play who created the fab paper pieced pattern for it. You can find that Camera pattern in her Craftsy shop along with the patterns for the random polaroid blocks on the back.
Kristy has already sent 4 quilts to the Bushfire affected family and I will send this one, along with my first ever quilt.
I had just enough time this afternoon to catch the last of the sun to photograph the quilt. And so did the chooks.
Thursday, 21 March 2013
Almost Enough
I started quilting the Tall Boy Runner last night. I trimmed.
Then I had some original binding left over from the Astor Manor quilt. Score!
Darn!
Modern Sliced Scrappy Block
This block design comes from Elizabeth at Don't Call Me Betsy.
Friday, 22 February 2013
Winter Solstice Finish
In between squally rain showers I nipped out next to our pond to photograph the finished Winter Solstice Quilt.
Our weather is influenced yet again by another East Coast low. I have seen the sun blink out from clouds twice in the past 5 days. It makes for some wet photography.
I used the very clever Quick Binding Quilt method by Quilting in the Rain (cooincidence?) to bind this lap quilt. Lao Lao leaves to go home to China next Thursday and so I am glad to have in done in advance.
This week Sunday Stash celebrates ONE year with a little give-away. For a chance to be in the running, you just need to link up a recent fabric, notion, book etc. purchase. See you back here on Sunday for that.
How did you go this week? Any finishes? I may see you over at TGIFF.
Tuesday, 15 May 2012
Rain Cloud Mug Rug
Zakka Style Sew-Along - Week 7
I was actually going to skip this Zakka Style project because I have 2 mug rugs already and the design did not really interest me. However after spending hours cutting up fabrics, I needed to do some sewing.
This project was made with all scrap fabrics, mostly leftover from what Denyse Schmidt and Kona fabrics I had been cutting earlier that day.
It is a simple pattern and design and really you can pour as much creativity into this project as your imagination and time allows. Perhaps the original's simplicity of design and material best highlights the Zakka style.
Some Tips
Hold your book up to a window to trace the applique design to your 'cloud' fabric.
You don't need to do hand stitched 'needle turn' applique to attach the rain cloud. A close stitch width and length zig zag will do the job just as nicely.
It may be a good idea to use fusible interfacing to keep it in place.
I used a blanket stitch for mine.
If you are going to machine quilt the 'wind' lines, I suggest you clearly mark them on your work with a water soluble marker. I drew mine by hand.
If you have a darning foot, attach this and drop the feed-dogs.
Then warm up your free-motion skills by doing a few practice swirls. I made the mistake of doing this cold and so it looks very tentative.
This 5" charm was a scrap sent with an Etsy order so I used some leftover scraps of Kona Ash from cutting the Katie Jump Kites solid that morning. This bumped it out to about 6" square.
I have added quite a few colours to my stash since hand quilting the Fussy Fairytales quilt and thought that I might put them to some use. I tossed up using only reds and pinks but decided upon the 7 colours of the rainbow instead.
My front was slightly larger than the back but I spray basted them together and cut the front down to match.
Binding the Mug Rugs
Now here's where the pattern becomes too vague for non-quilters. It tells you to bind the quilt with a 1/4" seam allowance and using the single fold binding directions on page 25. However, these directions are for a straight piece and DO NOT explain what to do at each corner. Here's where quilters would do what's known as a Mitred corner. There is a tutorial here to help those who do not.
Sew the binding down on 3 sides and leave the ends unsewn with a 3" gap.
Fold one of the strips back on itself and lay the opposing strip over the top and stitch over the top with a back stitch.
Trim the excess 'tails' of binding off and then fold the binding over to the back and pin.
Turn the binding up under itself at the back and pin down with pins. I use bobby pins.
Flip the mug rug back to the front and then stitch in the ditch between the fabric and the binding being sure to catch the binding at the back. A normal foot is fine for single-fold binding rather than the usual 'walking foot' used in double-fold binding. You may want to read up on binding techniques at Red Pepper Quilts, Crazy Mom Quilts or Cass the Coolest.
Set the kettle boiling and pour yourself a cup of tea, throw in a treat and enjoy your mug rug.
How are you going on the Zakka Style Sew-Along? Such lovely ladies on the Flickr page and I have one Quilt Club Australia friend join this week. Nice!
Linking up with...

I was actually going to skip this Zakka Style project because I have 2 mug rugs already and the design did not really interest me. However after spending hours cutting up fabrics, I needed to do some sewing.
This project was made with all scrap fabrics, mostly leftover from what Denyse Schmidt and Kona fabrics I had been cutting earlier that day.
It is a simple pattern and design and really you can pour as much creativity into this project as your imagination and time allows. Perhaps the original's simplicity of design and material best highlights the Zakka style.
Some Tips
Hold your book up to a window to trace the applique design to your 'cloud' fabric.
You don't need to do hand stitched 'needle turn' applique to attach the rain cloud. A close stitch width and length zig zag will do the job just as nicely.
It may be a good idea to use fusible interfacing to keep it in place.
I used a blanket stitch for mine.
If you are going to machine quilt the 'wind' lines, I suggest you clearly mark them on your work with a water soluble marker. I drew mine by hand.
If you have a darning foot, attach this and drop the feed-dogs.
Then warm up your free-motion skills by doing a few practice swirls. I made the mistake of doing this cold and so it looks very tentative.
This 5" charm was a scrap sent with an Etsy order so I used some leftover scraps of Kona Ash from cutting the Katie Jump Kites solid that morning. This bumped it out to about 6" square.
I have added quite a few colours to my stash since hand quilting the Fussy Fairytales quilt and thought that I might put them to some use. I tossed up using only reds and pinks but decided upon the 7 colours of the rainbow instead.
My front was slightly larger than the back but I spray basted them together and cut the front down to match.
Binding the Mug Rugs
Now here's where the pattern becomes too vague for non-quilters. It tells you to bind the quilt with a 1/4" seam allowance and using the single fold binding directions on page 25. However, these directions are for a straight piece and DO NOT explain what to do at each corner. Here's where quilters would do what's known as a Mitred corner. There is a tutorial here to help those who do not.
Sew the binding down on 3 sides and leave the ends unsewn with a 3" gap.
Fold one of the strips back on itself and lay the opposing strip over the top and stitch over the top with a back stitch.
Trim the excess 'tails' of binding off and then fold the binding over to the back and pin.
Turn the binding up under itself at the back and pin down with pins. I use bobby pins.
Flip the mug rug back to the front and then stitch in the ditch between the fabric and the binding being sure to catch the binding at the back. A normal foot is fine for single-fold binding rather than the usual 'walking foot' used in double-fold binding. You may want to read up on binding techniques at Red Pepper Quilts, Crazy Mom Quilts or Cass the Coolest.
Set the kettle boiling and pour yourself a cup of tea, throw in a treat and enjoy your mug rug.
How are you going on the Zakka Style Sew-Along? Such lovely ladies on the Flickr page and I have one Quilt Club Australia friend join this week. Nice!
Linking up with...

Wednesday, 14 March 2012
Little Dolly Quilt A and B
After quilting and zig zagging around the perimeter it was time to trim the excess batting and fabric away. I wasn't entirely happy with the basting spray effort of holding the sandwich together...so there was a bit of unpicking and repinning with my usual basting safety pins.
I had just enough of the plaid blue and white pillowcase fabric left to make both bindings - phew!
So the binding was sewn onto the front.
Ironed and pinned using these colourful bobby pins ( a great idea I saw on Pinterest instead of using pins).
Little Quilt A is done.
Florrie looks happy with it. She is waiting on a parcel of gorgeous new dolly dresses and pjs made by her creator, Emma of Jem of Mine Dolls. This is the first time her legs have been out of the mermaid tail since early January.
Little Quit B is pinned but I haven't sewn the binding through to the back yet.
This week's stats:
Completed projects - 2 pram/dolly quilts - finished and for sale in my Etsy shop 'Florrie and Stan'.
- Little Dolly Quilt A
Currently in progress - Little Dolly Quilt B - binding made and sewn part way on.
- Feb scrappy log cabin quilt - quilt top sewn together and ready to be basted.
New projects - 1 = baste and quilt 'HR Far Far Away 2&3 Fussy Fairytales' quilt
- Feb scrappy log cabin quilt - quilt top sewn together and ready to be basted.
New projects - 1 = baste and quilt 'HR Far Far Away 2&3 Fussy Fairytales' quilt
I am linking up with....
Subscribe to:
Posts (Atom)