Itty Bitty Pretty Tricky
This week's Zakka Style Sew-Along looked so cute and do-able. However it proved to be quite tricky indeed. It took a lot of time because everything was done on a tiny scale. It felt like I was sewing tiny quilts for the mice of Brambly Hedge.
Itty Bitty Quilt Block Magnets - Week 6
It was a great project for scraps and selvedges. I used my Katie Jump Rope bits.
I decided to make 2 sets at the same time.
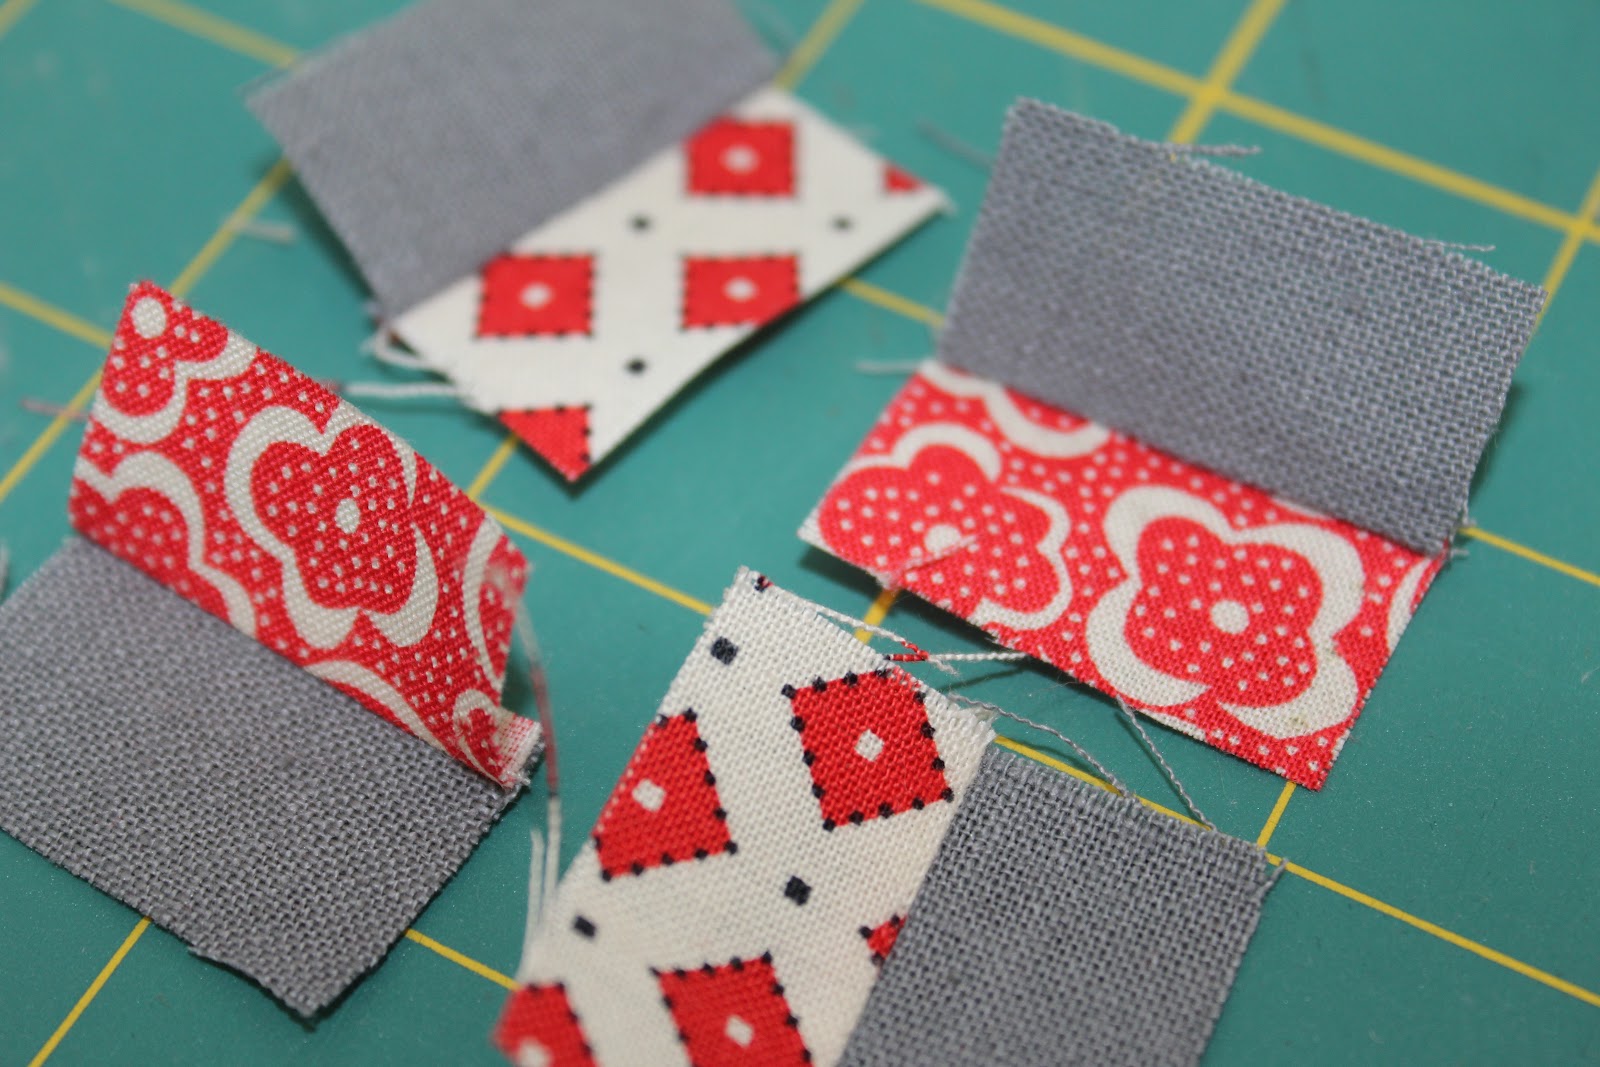
There were 6 tiny patchworks to cut pieces for. This was tricky with a rotary cutter.
Nesting the tiny 1/8" seams together. The pattern calls for a 1/4" and then cut it down to 1/8 but I sewed mine at 1/8" and I had to adjust the measurements for the front and back.
I finger pressed quite a bit of the pieces.
Then there was the foundation paper piecing and peeling off the paper from a smaller stich length of only 1.0.
The smallest half-square triangles HSTs ever. I can imagine that for non-quilters this would be a tricky block to make. I trimmed all of my HSTs to get them to match up.
Then I discovered that my magnets were not powerful enough so I combined them with some 'gem bond' glue.
I made many, many errors including sewing the fabric onto the wrong side or the wrong way around...and unpicking tiny seams was no joke.
Trim the corners and excess fabric and batting before turning.
Turning the magnets right side through was difficult. Then holding the last seam closed as I hand sewed it shut nearly had me undone.
I gave up on trying to complete 2 sets and settled on one victory for the time being. I did enjoy the machine quilting and then the decorative hand quilting (getting very effective at it thesedays) onto the linen.
Here's the completed half dozen. Five of mine were 2.5" square and one was 2" square. I think the pattern has them measure in at 1.5" so that would be incredibly tiny and difficult to turn.
Tips
- Use a smaller stitch length such as 1.5 to help strengthen the seams.
- Don't overdo the spray adhesive as it tends to dry stiff and stain the fabric.
- Try a stronger circular magnet rather than a sheet type and glue it to the batting AFTER you have turned the square and BEFORE you stitch the seam closed.
- To give the piece extra strength during the turning through process try double stitching on all sides and triple on the corners.
- Try deliberately sewing a corner so that you don't cut into the stitching accidently as you trim the corners.
- Get the mice of Brambly Hedge to sew them for you next time - it would be easier!
 |
| Image from Royal Doulton |
I am enjoying all the new blogs and lovely ladies I have found through the ZSSA. The Flickr group is so supportive and very creative.
I am linking up with...


Hahaha, oh no! I'm about to start mine, having been staring at the fabric bits for a while now. Thanks for the tips. I'll post mine too if I make it through!
ReplyDeleteThanks for the tip on shortening the stitch length. I've already pieced my blocks but I'll do that for attaching the back- maybe that way they'll hold! For the string block I looked at those directions and skipped the paper piecing- it looked like too much work for straight lines. I squared it up just fine.
ReplyDeleteCan you believe these are my first-ever quilt blocks? I must be daft, deciding this is a good way to sew. They're so cute, though :) Hope I still think so after I get through the steps of batting and backing and inverting.
to *learn to* sew, that should say!
DeleteRobin...if you can patchwork at this scale, you will find 'normal' measurements a breeze. Can I encourage you to do a simple quilt - some of these block designs were great - I learned my first quilt (5" charm square baby quilt) by watching 'Missouri Star Quilt Company' tutorials on Youtube. They are soooooo helpful.
DeleteI will! My list of projects far exceeds my sewing time - I never even see my machine until after the kids' bedtime. So I don't know when I'll get to it, but I'll use charms to practice blocks soon. It's great advice - thanks!
DeleteOh dear, I'm getting scared.
ReplyDeleteIn the words of Henry V "Once more to the bridge dear fellows!"
DeleteHard work they were but I must admit, they brighten up the fridge. I love your fabrics - perfect for hanging alongside the handprint. Mine finished at just 1.5" and they were EXTREMELY tricky to turn and to whipstitch closed. Phew!! Next week's object looks a lot easier - or should I have whispered that?
ReplyDeleteYes I thought that they might be ultra small in the end. Losing a 1/4" each time is a LOT when you are working with such small pieces. Hehehe for the next project - they look deceptively easy time UNTIL you make them.
DeleteThey look so cute, but sound impossible. The correct size is 1.5"? That sounds crazy!
ReplyDeleteI've just ordered the book so will be rather interesting to see the projects inside =D
These were a real challenge, but they are so cute that I'm thinking of making more. Just like childbirth...we soon forget! I love the photo of yours with the handprint and the little snails...priceless!
ReplyDeletehaha. What a fun little post - love the bit about the mice! Darling end product though! Awesome fridge photo!
ReplyDelete